
The Ultimate Guide to Hard Gel Extensions: Application, Benefits and Expert Tips
Hard gel extensions have revolutionized the nail industry, offering a durable, flexible, and lightweight alternative to acrylics. Whether you’re a nail enthusiast, a professional nail technician, or a beginner looking to perfect your technique, this comprehensive guide will walk you through everything you need to know about hard gel extensions—from application to maintenance.
What Are Hard Gel Extensions?
Hard Gel is a type of nail enhancement that provides a strong natural-looking structure. Unlike traditional gel polish, hard gel is not soak-off and must be filed down for removal. It hardens under a UV or LED lamp and creates a solid and durable extension that lasts for weeks.It is a perfect solution for individuals with brittle, short nails who want extra length without the heaviness of acrylics.
Benefits of Hard Gel Extensions
- Durability – Hard gel is strong, making it ideal for long-lasting manicures.
- Lightweight & Natural Feel – Unlike acrylics, hard gel provides strength without a heavy or bulky sensation.
- Flexible & Less Prone to Breakage – It bends slightly under pressure, reducing the chance of cracks and breaks.
- High-Gloss Finish – Hard gel maintains a smooth and shiny surface longer than traditional polish.
- Customizable Shapes & Lengths – Can be sculpted into various shapes, including almond, coffin, or stiletto.
- Odor-Free Application – Unlike acrylics, hard gel has minimal odor, making it more comfortable to work with.
Feature
- Strength
- Application
- Weight
- Removal
- Odor
- Best For
Hard Gel
- Strong but flexible
- Requires UV/LED curing
- Lightweight
- Filed off
- No strong smell
- Natural-looking extensions
Acrylic
- Very strong but rigid
- Air-dries with monomer
- Heavier
- Soaked off or filed
- Strong monomer smell
- Very strong extensions
Soft Gel
- Less durable
- Cures under UV/LED
- Very lightweight
- Soaked off with acetone
- No odor
- Short-term manicures
Step-by-Step Guide to Applying Hard Gel Extensions
Step 1: Nail Preparation
Proper nail prep is important for a long lasting hard gel manicure. Follow these steps:
- Push Back the Cuticles – Use a cuticle pusher to gently push back the cuticles, creating a clean surface.
- Shape the Natural Nails – Trim and file the nails to your desired base shape using a soft nail file.
- Buff the Nail Surface – Lightly buff to remove any shine from the natural nails. Avoid over-buffing, as this can weaken the nail plate.
- Clean and Prime – Wipe away dust using alcohol or a nail cleanser, then apply a nail primer to dehydrate the nail and improve adhesion.
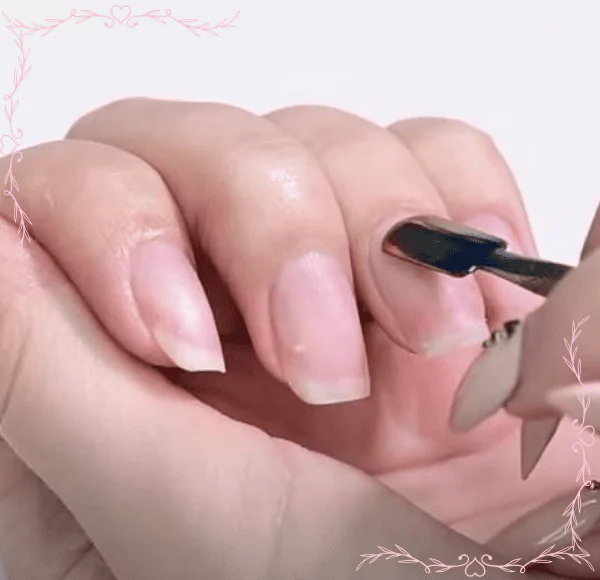
Push Back the Cuticles
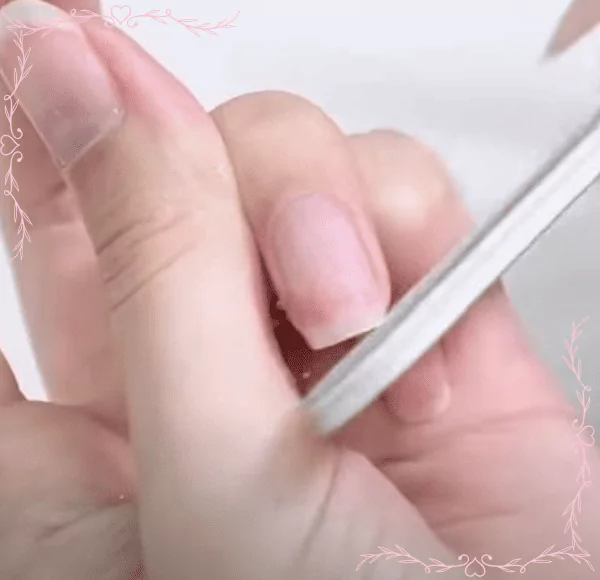
Buff the Nail Surface
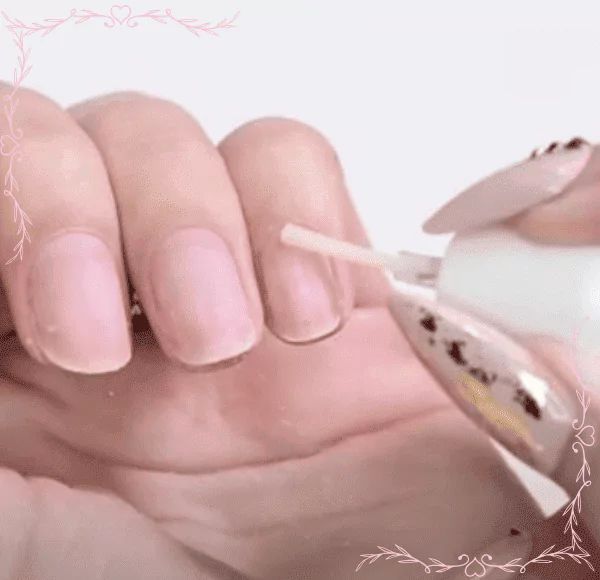
Clean and Prime
Step 2: Applying Nail Forms
Unlike pre-glued tips, nail forms allow you to sculpt the extension directly onto the natural nail.
- Prepare the Form – Detach the paper form from its base and adjust the perforated areas to match your nail shape.
- Position the Form Correctly – Slide the form under the free edge, ensuring it sits straight and follows the natural nail’s growth direction.
- Secure the Form – Press the sides firmly to prevent gaps, which can lead to gel leakage.
Step 3: Building the Nail with Hard Gel
There are different types of hard gel based on viscosity:
- Liquid Builder Gel – Comes in a bottle with a brush; requires multiple thin coats. Ideal for beginners.
- Medium Consistency Gel – Applies in one or two layers; suitable for faster application.
- Thick Builder Gel – Stays in place longer, allowing for precise sculpting; great for both beginners and pros.
Application Process:
Create the Nail Edge – Apply a thin layer of milky-colored gel to sculpt the nail’s free edge, then cure under a UV/LED lamp for one minute.
♥Tip: If your lamp is too strong, it can cause heat spikes. Choose one with a low-heat mode for a more comfortable curing process.♥
Remove the Nail Form – Once cured, gently peel off the nail form, starting from the upper part.
Apply the Main Gel Layer
- Spread the gel from the cuticle to the free edge, keeping the thickest part in the middle for structural strength.
- Avoid getting gel on the skin. If needed, flip the hand upside down for a few seconds to help self-level the gel.
- Cure under the lamp for one minute.
Refine the Thickness – If the gel is uneven, apply another coat and cure again. Use a lint-free wipe with rubbing alcohol to remove the sticky layer.
Step 4: Shaping and Refining the Nail
Once cured, the nails need to be shaped and buffed for a polished finish.
- File the Edges and Sides – Shape the extensions using a nail file. Popular shapes include coffin, almond, square, or stiletto.
- Adjust the Thickness
- The cuticle area should be the thinnest, blending seamlessly into the natural nail.
- The center of the nail should be the thickest for support.
- The free edge should be 1-2mm thick to prevent breakage.
Step 5: Finishing Touches & Nail Art
- Apply a Top Coat – Use a gel top coat to seal the nails and cure for one minute. This enhances durability and shine.
- Create a Vertical Gradient (Optional)
- Apply one color on one half of the nail and another color on the other half.
- Blend the colors smoothly with a gel brush.
- Cure each coat for one minute, repeating the process for a seamless ombré effect.
How to Maintain Hard Gel Extensions
- Avoid Excessive Pressure – While hard gel is strong, applying too much pressure can cause cracks.
- Use Cuticle Oil Daily – This keeps the cuticles and natural nails hydrated.
- Get Regular Fills – As the nails grow, infills are needed every 2-3 weeks to maintain the look.
- Never Pick or Peel – To avoid nail damage, always have hard gel professionally filed off.
Hard Gel Extensions vs. Other Nail Enhancements: Which One Is Right for You?
- Choose Hard Gel If… You want long-lasting, lightweight, natural-looking extensions.
- Choose Acrylic If… You need extra strength and don’t mind a more rigid structure.
- Choose Soft Gel If… You prefer short-term manicures and easy soak-off removal.
Final Thoughts
Hard Gel Extensions offer the perfect balance between durability, flexibility, and beauty. With proper application and maintenance, They keep nails looking perfect for weeks. Whether you prefer a simple style or detailed designs, hard gel allows for endless creativity and customization.
Gel-X Nails Blog
Tips, trends, and nail care guides for perfect Gel X nails
One Response