Good old gel nail polish removal: the scourge of all nail professionals. The first “solution” that typically springs to mind is the urge to pick, tear, or bite off your gel polish at home. But please, don’t do it for the sake of beautiful nail art.
People frequently lament that their gels damaged their nails, however the problem actually lies in the shamed peeling. Layers of the nail plate are being removed each time you decide to remove your gel nail paint. Even while it might not seem like much, your nails will eventually get weaker, thinner, and more brittle. It may take months for your nails to recover after this injury.
Let’s be clear: the best approach to get your gels removed is always to see a professional, ideally the same person who performed your gel treatment. In order to do the work safely, your nail technician possesses more patience than you, understands exactly how to do it, and has the necessary equipment.
Meet the Experts:
Dr. Dana Stern is a board-certified dermatologist in private practice in New York City.
Michelle Humphrey, London-based celebrity and session manicurist.
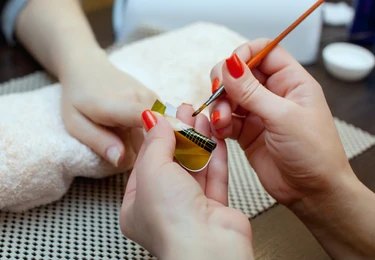
According to celebrity and session manicurist Michelle Humphrey, a gel manicure involves applying gel polish to the nail plate and curing it with an LED or UV lamp. Without the lamp, the gel polish will not dry. This usually consists of a top coat, two color coats, and a base coat. The gel polish is cured under a UV/LED light following each application. This aids in gel polish setting. The reason gel polish lasts so long is because it won’t set or stick to the natural nail if this step is skipped.
Think of gel manicures as a semi-permanent polish since they are far more resilient than conventional varnish and can typically be worn for several weeks without peeling.
Gel polish manicures have so many advantages that they have revolutionized manicures in the present day. They definitely last a lot longer than a standard nail polish manicure, which is the first and most evident benefit.
When worn, it keeps its gorgeous, glossy sheen and looks brand new. According to Francis, if proper maintenance and aftercare are practiced, there won’t be any chipping until the next manicure and there won’t be any surface scratches or dullness over time. Having a gel manicure can also help protect your natural nails by providing a stronger coating (compared to nail polish) and this can help your natural nails to grow (by protecting them), especially if keeping up with regular appointments.
Gels are ideal if you’re really impatient with waiting for your nails to dry after leaving the salon because they “cure” under a lamp rather than in the air.
The first thing you’ll need, according to Humphrey, is a file, buffer, acetone, or gel remover, cotton, squares of aluminum foil, cuticle oil, and an orange wood stick or cuticle pusher.
OK, Humphrey advises protecting your surfaces before beginning any real removal. “Gel remover will strip varnish or coatings off surfaces so be wary of this.” Consider using an old mat covered with paper towels and a towel. In this manner, you may be sure that your cherished coffee or dining table won’t be permanently damaged even if you spill and create a mess.
For eradication to be effective, this initial step is essential. Take out your nail file (180 grit is what Humphrey suggests using to get the job done) and start filing off the top layer of your gels, being careful to get rid of all the shine. In order for the acetone to begin dissolving the dried paint, this breaches the gel seal. “If you skip this stage you’ll find removal a nightmare, if not impossible,” Humphrey warns. “Some gel polish top coats are so hardwearing, if you don’t buff or file it beforehand, it won’t budge,” says Francis.
Although it still isn’t essential for removal, this greatly aids in any drying that the acetone may cause. “Apply cuticle oil to the skin surrounding the nail to help with dehydration,” explains Humphrey. “It doesn’t stop or inhibit the removal, it just helps to make the removal less drying as pure acetone can be harsh,” she says. Are you forgetting this step, “gels ruin my nails” crew?
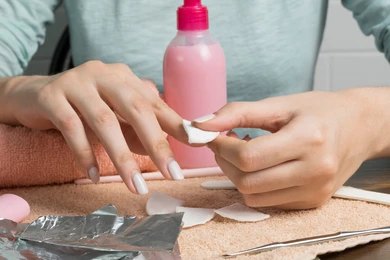
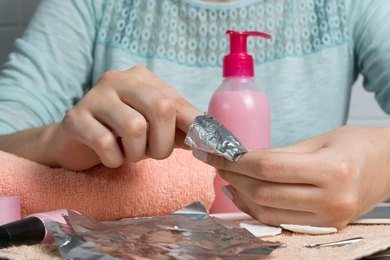
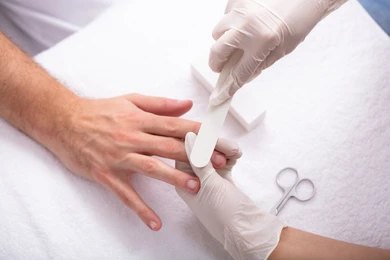
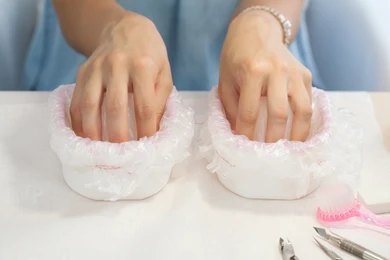
The actual soaking off comes next. “Saturate a square of cotton (either a round cut to size or ball) in acetone, place it on the nail and then wrap the foil around as tightly as possible,” Humphrey clarifies. “Leave this for around 10 minutes.”
The cotton round should be completely saturated because it might occasionally dry out. accomplish this five fingers at a time to make your life simpler because it might be challenging to accomplish this on all ten fingers at once.
After removing the foil, your gel should appear to be actually peeling off. “Gently push off any gel that’s come loose using your orange wood stick or cuticle pusher,” Humphrey advises. You shouldn’t exert a lot of force. “Re-wrap if necessary and repeat if parts of the gel have not come off — never force any product off the nail plate as this will cause damage,” she cautions.
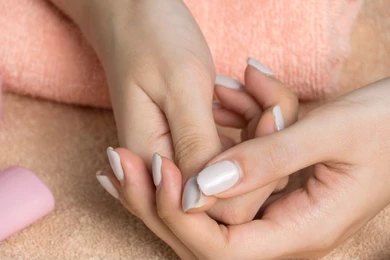
“Once you’ve removed all the gel, gently buff your nails with a soft buffer (220 grit ideally) and apply plenty of cuticle oil,” Humphrey suggests. “I recommend the Essie Apricot Nail and Cuticle Oil, and hand cream to rehydrate.”
Francis adores Susanne Kaufmann’s Hand Cream for its rich, moisturizing texture that adsorbs rapidly, and Famous Names Dadi-Oil for its ability to moisturize dry skin without leaving a greasy behind.
“This process will probably take approximately 30-45 minutes to do yourself one hand at a time,” Humphrey adds. To avoid the temptation to unwrap and force gel off your nail plate, turn on your favorite Netflix program.
You can remove your gel polish at home without causing any damage if you follow these instructions. “It just takes patience and care,” Humphrey explains. “At no point should you force or peel any gel away from the nail plate as this can lead to damage,” she states. However, “because of the risk of developing an allergic reaction over time,” Humphrey advises against DIY gel use at home if you are not educated.
Tips, trends, and nail care guides for perfect Gel X nails
Don’t miss our future updates! Get Subscribed Today!
© [2025] Gel X Nails. All Rights Reserved